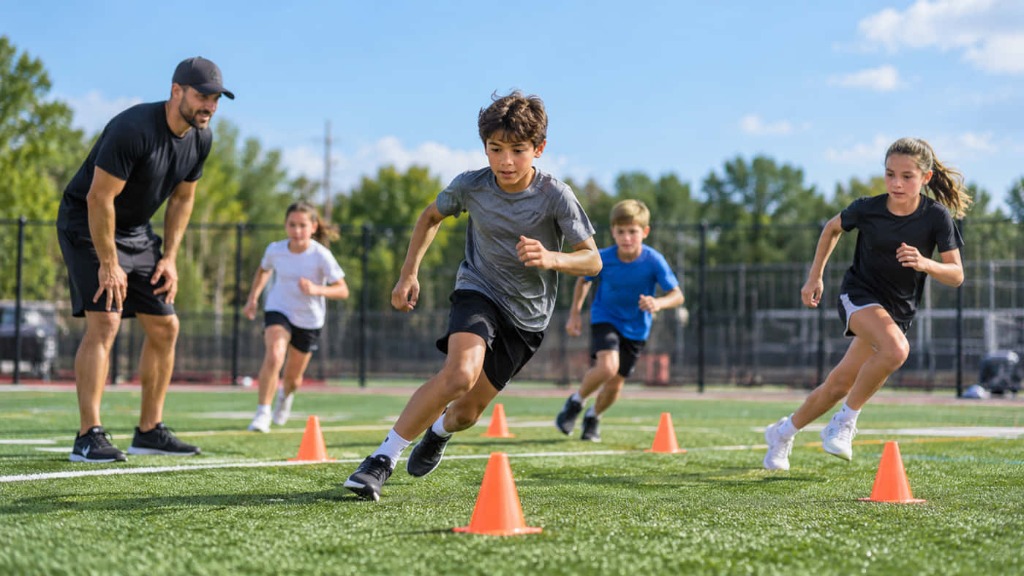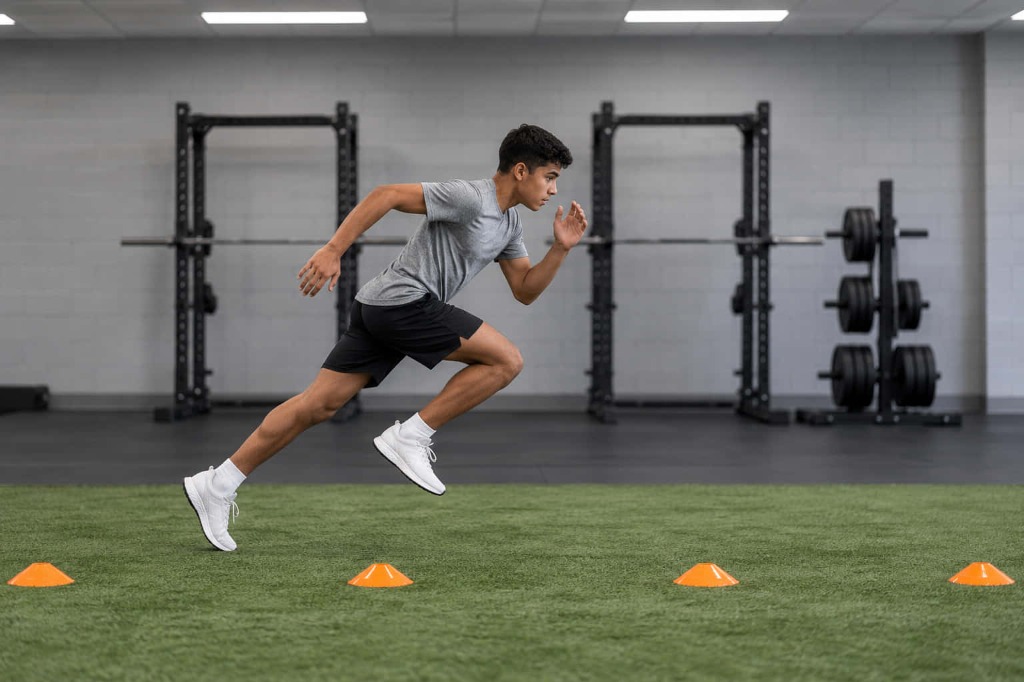
Choosing speed and agility drills for young athletes starts with one question: what movement problem are you trying to fix? An athlete beaten over the first three steps needs different practice from one who slips on cuts. This guide matches nine drills to specific skills. It shows what to watch for and when to simplify or progress.
This is general coaching education, not individual advice. An athlete with pain, a past injury, or a medical condition should get guidance from a qualified professional.
What Makes a Speed or Agility Drill Effective?
A drill works when it trains the skill the athlete needs, and the athlete can do it with control. Four skills often get lumped together:
- Acceleration: Building speed from a stop over the first several steps. The body leans forward, and the feet push back against the ground.
- Running speed: The top speed reached once upright. It needs longer runs than this guide covers.
- Deceleration: Braking under control. Every cut starts with slowing down.
- Change of direction: A planned cut or turn. Agility adds a reaction. Sheppard and Young define agility as a rapid whole-body change of speed or direction in response to a stimulus, such as a defender or a ball.
Structured training that combines these skills can help. A 2026 meta-analysis in Scientific Reports looked at adolescent and young adult team ball sport athletes. It found that speed–agility–quickness training improved planned change-of-direction speed compared with control groups. That supports this type of training in general. It does not prove that any single drill below works for every athlete.
| Movement challenge | Training focus | Drill category | What the coach should observe |
|---|---|---|---|
| Slow over the first three steps | Acceleration | Falling starts, standing starts, wall marches | Forward lean held through the first steps |
| Fades late in longer sprints | Running speed | Longer build-up runs (not covered here) | Tall posture, relaxed rhythm |
| Overruns stops or stumbles | Deceleration | Stopping drill | Steps needed to stop; balanced finish |
| Slips or slows sharply at cuts | Change of direction | Planned cutting, cone shuffle | Hips lowering before the plant; speed leaving the cut |
| Good in drills, late in games | Agility | Coach-called variations | Time from cue to first movement |
Rule for choosing drills: Describe the problem in one sentence, then pick the drill. “She stands up on her second step” points to acceleration work. “He slides past the cone” points to stopping practice first.
Five Drills to Develop Acceleration
These acceleration drills run from simplest to most demanding. Distances are coaching starting points, not fixed rules.
1. Falling Starts
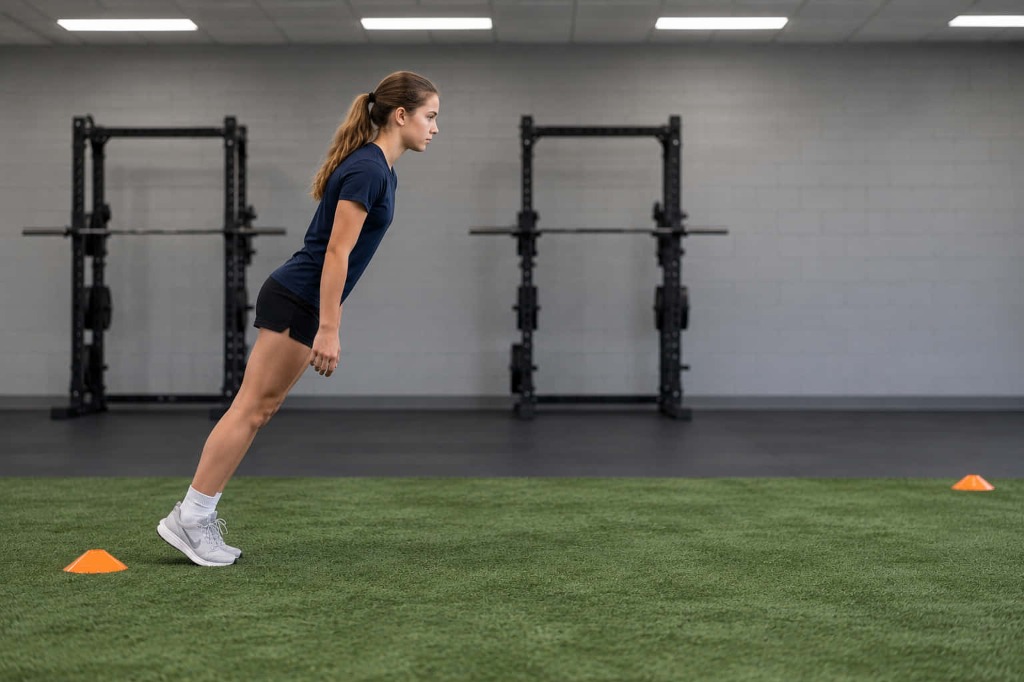
Purpose: Teaches the forward lean and first push. It doesn't train reaction or top speed.
Suitable level: Sprints short distances pain-free and can stand tall with a braced trunk.
Equipment: Two cones and a flat, non-slip surface.
Setup: Cones about 10 yards apart. The athlete stands tall at the first cone, feet hip-width apart.
How to perform it:
- Stand tall with weight toward the balls of the feet.
- Lean forward from the ankles, body in one straight line.
- Step only when the lean forces it.
- Drive the first step down and back under the hips.
- Sprint through the second cone, then walk back.
Coaching cues: “Fall like a plank.” “Push the floor away behind you.”
Common mistake and correction: Bending at the waist, so the hips stay back. Cue a straight line from head to heels, and practice the lean into a partner's hands first.
Regression: Lean into a partner's hands. The partner steps aside, and the athlete runs five yards.
Progression: Start on a clap, then extend to 15 yards.
What to watch for: Does the lean hold for two or three steps? Popping upright on step one means repeat, not progress.
2. Standing Starts
Purpose: Acceleration from a still, staggered stance, as in many sports. It doesn't train reacting to opponents.
Suitable level: Holds a consistent lean in falling starts.
Equipment: Two cones.
Setup: Start line and finish 10 yards apart. Front foot at the line, back foot about hip-width behind, opposite arm forward.
How to perform it:
- Set the staggered stance.
- Shift weight onto the front foot.
- Hold still briefly.
- Push off the front foot as the back knee drives through.
- Sprint through the finish.
Coaching cues: “Weight on the front foot.” “Punch the back knee forward.”
Common mistake and correction: Standing straight up on step one, so the push goes up, not forward. Put a cone three yards out. Keep the chest ahead of the toes until passing it.
Regression: Return to falling starts, or shorten to five yards.
Progression: Start on a signal, or from sport-specific stances such as side-on.
What to watch for: Rocking backward before moving. The goal here is a forward push, so cue the weight forward until the start.
3. Short-Distance Acceleration
Purpose: Links the start to the next 10 to 20 yards and shows whether technique holds as speed builds.
Suitable level: Solid falling and standing starts.
Equipment: Three cones.
Setup: Start cone, a check cone at 5 yards, and a finish at 15 to 20 yards.
How to perform it:
- Begin with a falling or standing start.
- Drive through the check cone.
- Keep accelerating to the finish.
- Slow down gradually after the finish.
- Walk back and rest.
Coaching cues: “Rise gradually, don't pop up.” “Run through the cone.”
Common mistake and correction: Easing off before the finish. Ask the athlete to slow down only after passing it.
Regression: Shorter distance, fewer reps.
Progression: Vary the start: from a shuffle, a backpedal, or lying face down.
What to watch for: Does the last rep look like the first? If not, end the set.
4. Wall Marches
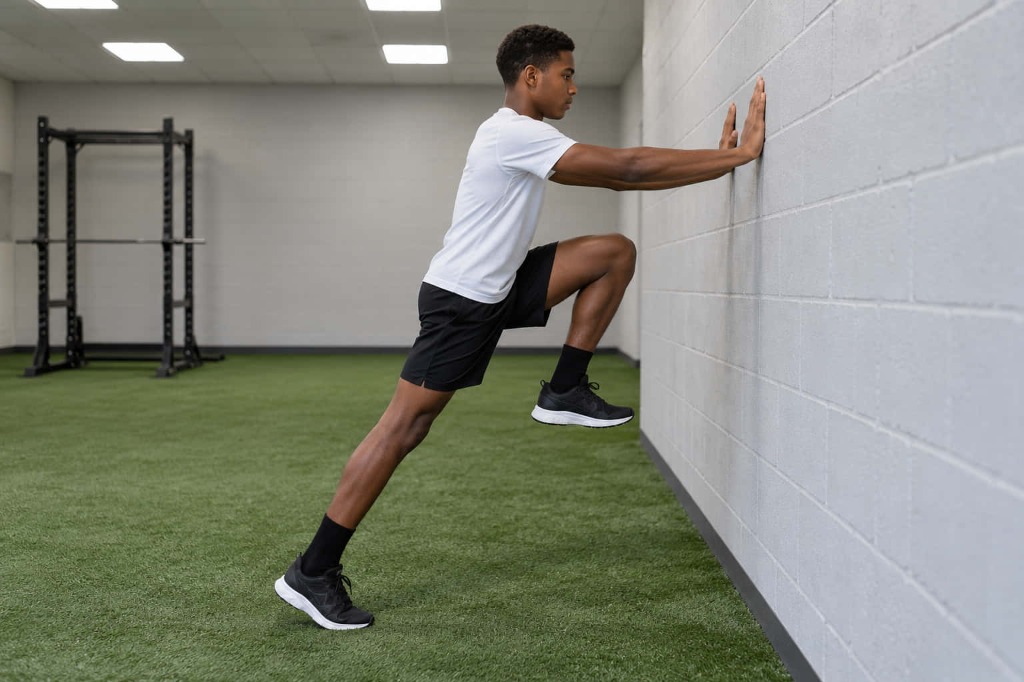
Purpose: Teaches the acceleration body shape and knee drive at slow speed. There's no forward travel or real push-off, and the rhythm is far slower than sprinting. Treat it as shape practice, not sprint training.
Suitable level: Holds a straight, plank-like line. Suits beginners.
Equipment: A solid wall.
Setup: Hands on the wall at shoulder height, arms straight. Feet walked back into a straight forward lean.
How to perform it:
- Set the lean with arms straight.
- Lift one knee, toes pulled up.
- Place the foot down under the hips.
- Switch legs in a slow march.
- Speed up only while posture holds.
Coaching cues: “Ears to ankles in one line.” “Foot down under your hips.”
Common mistake and correction: Hips sag or pike as the knee lifts. Move the feet closer to the wall and slow down.
Regression: Lift and hold one knee for two seconds before switching.
Progression: Faster switches, then carry the shape into falling starts.
What to watch for: If the wall shape is good but the sprint shape isn't, spend more time on short starts, not more wall work.
5. Resisted Acceleration
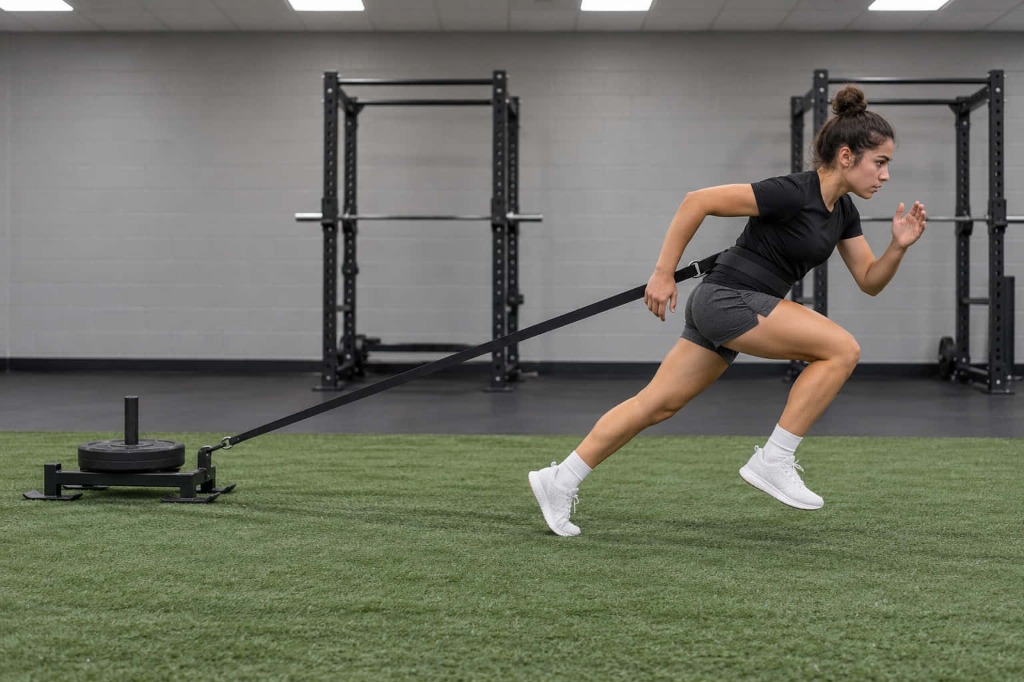
Purpose: Adds resistance so the athlete practices a forceful push in a forward lean. Too much resistance turns it into a different movement.
Suitable level: Consistent unresisted technique. This is a coach-supervised drill, not one to set up at home.
Equipment: One option: a sled with a waist belt, a partner-held resistance belt, or a gentle hill.
Setup: 10 to 15 yards on a consistent surface. The coach watches from the side.
How to perform it:
- Fit the belt snugly at the waist.
- Take a falling or standing start position.
- Accelerate against the resistance in a forward lean.
- Run one free rep afterward to compare.
Coaching cues: “Same shape as without the sled.”
Common mistake and correction: The resistance is too heavy. The athlete folds at the waist, and the steps shorten into a trudge. Reduce the resistance straight away.
In a study of 70 high school athletes, the sled load needed to slow athletes by a set amount varied widely between individuals. The researchers advised setting loads per athlete, based on how much each one slows down, rather than a fixed percentage of body mass. Without that testing, start very light and judge by mechanics.
Regression: Remove the resistance, or use a partner who can ease off instantly.
Progression: Resisted-then-released starts. The partner holds the belt for a few steps, then lets go.
What to watch for: Compare side views of resisted and free reps. If they look clearly different, lighten the resistance.
Four Drills for Footwork and Change of Direction
Many agility drills for athletes jump straight to fast cone patterns. Control comes first. These drills start planned, and reactive versions come later. If an athlete can't stop under control, teach the stopping drill before hard cuts.
6. Cone Shuffle
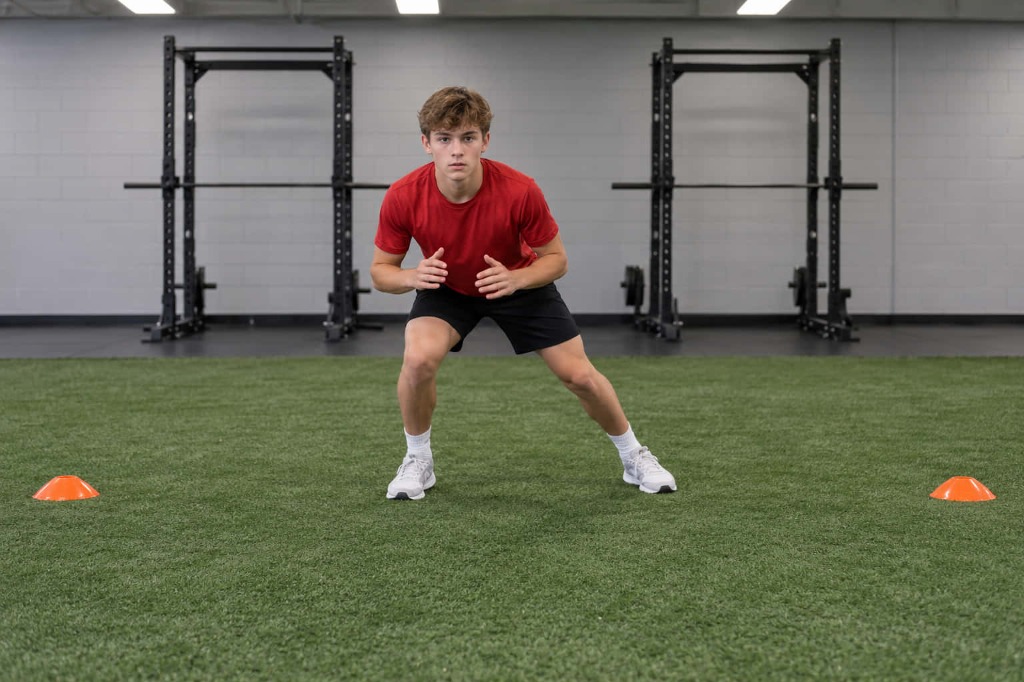
Purpose: Lateral movement on a stable base. In a shuffle, the hips face forward, and the feet never cross. A crossover step turns the hips and crosses the trailing leg over to cover ground quickly. This drill trains the shuffle.
Suitable level: Holds an athletic stance (knees bent, hips back, chest up) without wobbling.
Equipment: Two cones.
Setup: Cones five yards apart. The athlete faces forward in an athletic stance.
How to perform it:
- Push off the trailing leg toward the far cone.
- Step the lead foot out, then bring the trailing foot in without the feet touching.
- Keep the hips level.
- Plant the outside foot at the cone and push back.
- Complete two or three lengths, then rest.
Coaching cues: “Push, don't reach.” “Feet never touch.”
Common mistake and correction: The feet click together or cross, and the head bobs. Slow down and widen the stance.
Regression: Walking pace over a shorter distance.
Progression: Shuffle three yards, then turn and sprint. Later, the coach points the direction.
What to watch for: A steady head height and a clean reversal at each cone without extra steps.
7. Planned Cutting Drill
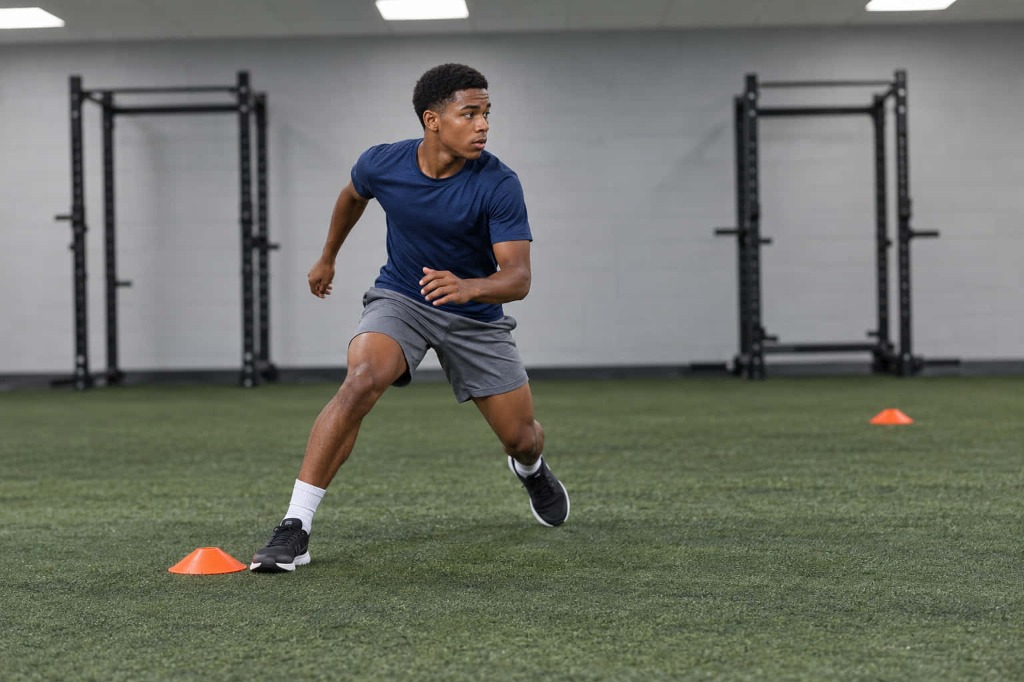
Purpose: Trains the approach, plant, direction change, and exit. The direction is known in advance, so it isn't reactive agility.
Suitable level: Stops under control and shuffles without losing balance.
Equipment: Three cones.
Setup: A start cone, a cut cone 5 to 10 yards ahead, and an exit cone about 5 yards away at roughly 45 degrees.
How to perform it:
- Approach at a controlled speed.
- Shorten the steps and lower the hips before the cone.
- Plant the outside foot and push toward the exit cone.
- Turn the hips and accelerate away.
Coaching cues: “Short steps before the cone.” “Eyes to the exit.”
Common mistake and correction: The plant knee drifts inward, or the athlete slips. Slow the approach, keep the shallow angle, and walk through the plant.
There's no single correct cut. Change-of-direction research treats cutting as task-specific. Cuts sharper than 90 degrees demand more braking force, while shallower cuts favor keeping speed. Foot placement and lean also vary by sport and situation. Treat these cues as a starting point a coach adapts.
Regression: Pause on the plant for one second before pushing off.
Progression: A faster approach, then 90-degree cuts, then a late left-or-right signal.
What to watch for: Does speed drop smoothly before the cut, or in one jarring step? If knee drift persists across sessions or comes with pain, get it assessed rather than drilling more.
8. Deceleration and Stopping
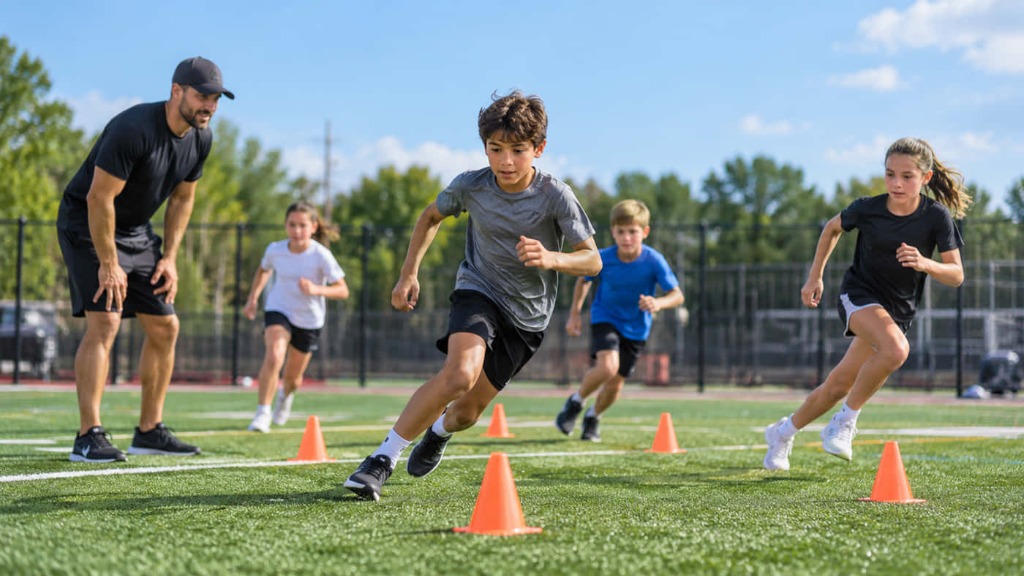
Purpose: Controlled braking and a balanced finish, the base for cutting. Deceleration researchers note that few validated training recommendations exist. Treat this drill as sound coaching practice, not a proven formula.
Suitable level: Runs at moderate speed without pain.
Equipment: Four cones.
Setup: A start cone, and a stopping zone marked by two cones about 10 yards ahead. Start with a long zone.
How to perform it:
- Run at moderate speed toward the zone.
- Start braking as you enter it.
- Shorten and quicken the steps while lowering the hips.
- Finish in a balanced stance and hold it for two seconds.
Coaching cues: “Chop your feet.” “Drop your hips and keep your chest over your knees.”
Common mistake and correction: One long, stiff braking step while leaning back, or stumbling past the zone. Lower the speed and allow more steps, then reduce them gradually.
Regression: Jogging speed with a longer zone.
Progression: A faster approach and a shorter zone. Then stop-and-sprint-back, or stop on a signal.
What to watch for: Can the athlete hold the finish without a hop or arm wave? If not, keep the current speed.
A typical decision looks like this: the athlete overruns the zone on a faster approach. The steps stay long, and the torso leans back, so the speed likely exceeds their current braking control. Drop the speed and lengthen the zone. Raise the speed again once the finish stays balanced across reps.
9. Multidirectional Movement
Purpose: Combines forward, lateral, and backward movement with controlled transitions. Coach-called directions turn it into agility work.
Suitable level: Comfortable shuffling, stopping, and backpedaling at moderate speed.
Equipment: Four cones.
Setup: A square with five-yard sides.
How to perform it:
- Sprint forward to cone two.
- Shuffle right to cone three.
- Backpedal to cone four.
- Shuffle left to the start.
- Rest, then reverse the direction.
Coaching cues: “Stay low at every corner.” “Short steps going back.”
Common mistake and correction: Rounding the corners, standing tall at transitions, or leaning back in the backpedal. Slow to jogging pace and pause at each cone.
Regression: Walk the pattern, or use forward and backward movement only.
Progression: More speed, then the coach calls each direction.
What to watch for: Steady hip height through the transitions, and feet under the body in the backpedal.
How to Perform Each Drill Correctly
| Checkpoint | What good looks like | Sign it's breaking down |
|---|---|---|
| Starting position | Balanced, still, weight slightly forward | Rocking or weight on the heels |
| First movement | A clear push in the intended direction | Hesitation or an upward pop |
| Body control | Trunk steady, head level | Bending at the waist, head bobbing |
| Foot placement | Under or behind the hips when accelerating, outside the body when cutting | Reaching far ahead, or crossing feet in a shuffle |
| Braking & direction changes | Steps shorten and hips lower before the change | One stiff step, or sliding past the cone |
| Finishing position | Balanced and able to move again | Stumbling or hopping to recover |
Watch two or three reps. Go down the list and correct the first checkpoint that breaks down. Early errors often cause later ones; a messy cut often starts with an approach that was too fast. Give one cue at a time, and film from the side when you can.
Common Technique Mistakes
| Observable mistake | What it may indicate | Coaching correction | When to simplify |
|---|---|---|---|
| Standing upright too early when accelerating | The lean is unfamiliar | Cone at three yards; chest ahead of toes until passing it | If it happens on most reps, return to falling starts |
| Losing balance during cutting | Approach too fast or angle too sharp | Slow the approach; shorten steps before the plant | If it happens on back-to-back reps, use 45 degrees and a paused plant |
| Uncontrolled stopping steps | Braking starts too late | Brake earlier; chop the steps | If the athlete overruns repeatedly, lengthen the zone |
| Rushing through reps | Treating the drill as a race, or too little rest | Require a balanced finish before each rep | If quality drops through the set, cut reps and rest longer |
These are coaching observations, not diagnoses. An error can reflect skill, fatigue, strength, a growth spurt, or discomfort. If an error comes with pain or limping, or keeps returning despite coaching, ask a physician or physical therapist to assess the athlete.
How to Progress From Beginner to Advanced Drills
Progress when control is consistent, not because of age. Two athletes the same age can differ widely in growth, strength, and coordination. Progression in speed and agility drills for young athletes should follow what the athlete shows on the field. This fits the NSCA position statement on long-term athletic development, which calls for a structured, evidence-based approach for all youth:
- Practice the movement at a manageable speed.
- Repeat it with consistent technique across a full set.
- Increase speed or complexity gradually, changing one thing at a time.
- Add reactive decisions only after the planned movement is controlled. Reactive youth agility exercises add a decision on top of the movement.
- Reassess after each progression. If technique doesn't recover within the session, step back a level.
| Starting drill | Readiness sign | Next variation | Reason to delay |
|---|---|---|---|
| Wall marches | Body line holds during quicker switches | Falling starts | Hips sag or pike |
| Falling starts | Lean holds for two or three steps across a set | Standing or signal starts | Popping upright on step one |
| Short-distance acceleration | Posture consistent on every rep | Light, supervised resisted starts | Mechanics change in later free reps |
| Stopping drill | Balanced hold at moderate speed | Shorter zone or stop-and-sprint | Hops, stumbles, or overruns |
| Planned 45-degree cut | Smooth slowdown, quick exit | 90-degree cut or faster approach | Knee drifts inward, or athlete slips |
| Shuffle or planned square | Steady hips, feet never cross | Coach-called directions | Stance breaks when rushed |
One good session doesn't confirm readiness. Look for the same quality across several sessions before moving on.
How to Build a Short Practice Session
This example suits athletes who already run pain-free and have practiced the basic drills. It is not an individualized program. Adjust the reps to the athlete's training background and movement quality.
| Block | Time | Work | Recovery |
|---|---|---|---|
| Warm-up | 5 min | Easy jog, skips, side shuffles, backpedals, leg swings, walking lunges, then two or three build-up runs to a fast, relaxed pace | Continuous at an easy pace |
| Acceleration | 5 min | Two short sets of wall marches; four or five falling starts over 10 yards. Each sprint lasts only a few seconds. | Walk back, then pause. About 30 to 60 seconds between sprints is a reasonable starting point. |
| Change of direction | 5–6 min | Three or four stopping reps; two or three planned cuts to each side | Walk back between reps |
| Review | 2–3 min | Easy walking. The athlete names one thing that went well and one cue for next time. | — |
Short speed drills for kids work best when every rep is fresh. If the next rep looks slower or sloppier, rest longer. Beginners may need fewer reps, and experienced athletes may add a few if quality holds. If the same breakdown shows up on back-to-back reps, simplify the drill or end the block. Stop if the athlete reports pain. Don't ask young athletes to push through fatigue that is costing them control.
What to Look For in a Youth Speed and Agility Program
If you're comparing programs, these questions tell you more than marketing claims do:
- Coach qualifications: Does the coach hold a current certification from an established organization, such as ISSA or NSCA, plus CPR and first aid? Ask how long they have coached young athletes.
- Progressions: Are athletes moved up based on movement quality, or by age and schedule?
- Individual feedback: Does a coach watch and correct each athlete's reps?
- Goal assessment: Is there a starting assessment, with repeat checks under the same conditions? Does it cover technique as well as times?
- Safety and communication: What happens when an athlete reports pain? Do coaches tell parents what the athlete is working on?
- Workload: Does the coach ask about the athlete's sport schedule and plan around it?
How Peak Fitness Academy Approaches It
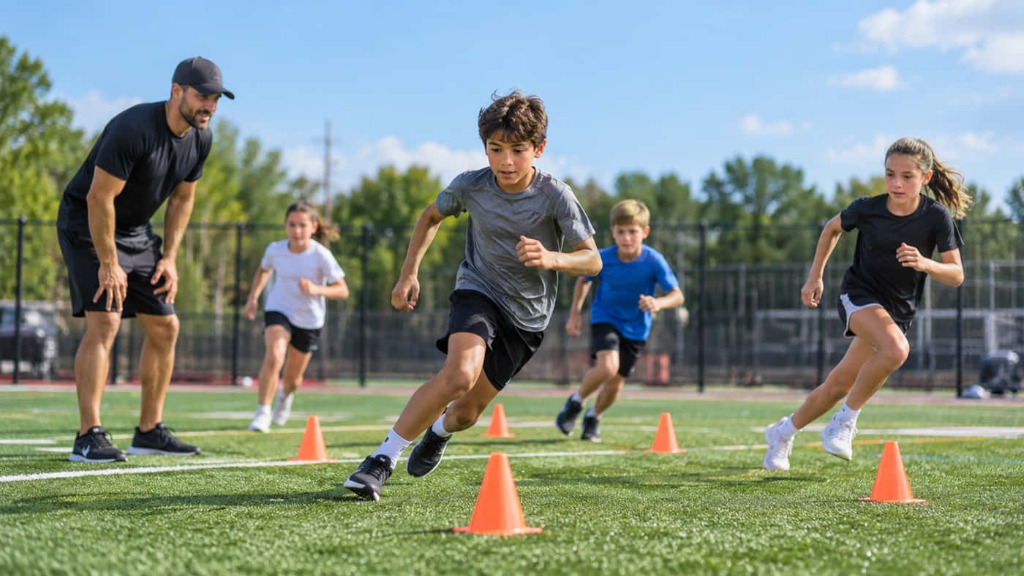
At Peak, speed and agility training is part of our Athlete Prep/DEVO, 1-on-1, and team programs. Sessions are led by Coach Greg, an ISSA Certified Personal Trainer and strength and conditioning coach who competed in two sports through college. New athletes start with a consultation and movement screening. Greg checks movement control, hip mobility, and landing mechanics before moving an athlete on to high-speed braking or reactive cutting. Sessions favor quality reps with enough recovery over conditioning drills run to exhaustion.
If you're weighing your options, the questions above are fair ones to ask us, too.
Frequently Asked Questions
What are the best speed and agility drills for young athletes?
The best drills match the athlete's main movement problem and can be done with control. For most beginners, that means falling starts, wall marches, a stopping drill, and a shallow planned cut. Add harder versions once those look consistent.
How often should young athletes practice speed and agility?
No single number fits every athlete. A practical start is a short block on a few non-consecutive days each week, counted as part of total sports load. The American Academy of Pediatrics recommends at least one to two days off per week from organized sport.
What is the difference between speed training and agility training?
Speed training improves straight-line acceleration and running speed. Agility training adds a reaction to an opponent, ball, or call. Many agility drills for athletes are really planned change-of-direction drills. That's fine, as long as you know which skill you're training.
Can beginners perform acceleration drills?
Yes. Simple acceleration drills, such as wall marches and short falling starts, suit beginners who can run pain-free. These basic speed drills for kids teach body position before speed. Save resisted work until free technique is consistent.
How can parents tell whether a drill is being performed correctly?
Look for control. The athlete starts balanced, moves in the intended direction, and finishes without stumbling. Reps should look alike. A side-on phone video helps, and you can ask the coach which cue the athlete is working on.
When should a young athlete progress to more difficult drills?
Progress after technique holds across reps and across several sessions. Change one thing at a time, and add reactive youth agility exercises last. If technique falls apart after a progression, step back a level.
Final Takeaway
Good speed and agility drills for young athletes start with a clear movement problem. Pick the drill that targets that skill, start at a level the athlete controls, and correct one thing at a time. Progress only when control is consistent. Simplify when technique slips, and stop when pain appears.
For athletes who want a broader plan that includes strength and movement work, see Peak's sports performance training options.
References & Scientific Sources
- Sheppard JM, Young WB. Agility literature review: classifications, training and testing. J Sports Sci. 2006;24(9):919–932. PubMed
- Effects of speed–agility–quickness (SAQ) training on pre-planned change-of-direction speed in adolescent and young adult team ball sport athletes: a systematic review and meta-analysis. Scientific Reports. 2026. Nature
- Cahill MJ, Oliver JL, Cronin JB, Clark KP, Cross MR, Lloyd RS. Sled-pull load–velocity profiling and implications for sprint training prescription in young male athletes. Sports. 2019;7(5):119. DOI
- Association of performance in strength and plyometric tests with change of direction performance in young female team-sport athletes. J Funct Morphol Kinesiol. 2021;6(4):83. DOI
- Harper DJ, Kiely J. Commentary on deceleration demands in team sports. 2018. PMC
- Lloyd RS, et al. National Strength and Conditioning Association position statement on long-term athletic development. J Strength Cond Res. 2016;30(6):1491–1509. NSCA
- Brenner JS; AAP Council on Sports Medicine and Fitness. Sports specialization and intensive training in young athletes. Pediatrics. 2016;138(3):e20162148. DOI